Saturday, April 27, 2013

Bridal Shower Layout

I recently came across some photos from my bridal shower 7 years ago.  There are only a handful photos I have, but they are a special few of some of the most important women in my life (My Mom, Mother in law, and both Grandmother's).  I generally do single page layouts but these deserved a two page spread.
 

The paper is from Bo Bunny's, Prairie Chic collection.  The butterflies and pink rhinestone flourishes are from Prima Marketing Inc.  The foam glitter letters are American Crafts Thickers.

Thanks for looking ~ Michelle


Tuesday, April 23, 2013

Octagon Gift Box

Did you know that Prima Marketing Inc. recently had a design team call?  What a great opportunity right?  There wasn't a lot of time left to apply when I saw the call so I had to get to work on my application.  Coincidentally, I attended a 3 day crop this past weekend at Running With Scissors, which had an abundance of Prima goodies to work with.  I was surprised to find that they carried some of Prima's paper lines as well as their gorgeous flowers and embellishments.  I honestly don't think I've come across any of their papers at any other local stores.

So, this paper caught my eye and was the inspiration for the color palette and the box.  I found the basic directions for the box here.  The handle and the stem of the bead bunch are attached to the top of the box with brads. The flowers are a mix of layers of old and new.  I love how the beads and flowers cascade down the front of the box. 


Supplies used -
Cardstock - Bazzil
Patterned Paper - Prima Marketing Inc.
Brads - Close to My Heart
Flowers & beads - Prima Marketing Inc.
Ink - Close to My Heart
Scor Pal or other scoring tool
Scor tape or other strong adhesive
Pop up adhesive
 
Thanks for looking ~ Michelle

Saturday, April 20, 2013

Quilt Mother's Day Card

Good morning!  I wanted to share an idea for a Mother's day card before I head off for day 2 of a 3 day murder mystery crop I'm attending.  The paper I used for this card is from My Mind's Eye's, Lost and Found collection.  I love the pretty feminine colors of this paper and the bits of sparkle it has.


To make the card, make your base from cardstock.  Next trim all those little squares, I used a paper trimmer, and they can be any size, depending on how many squares you want and the size card.  This would be a great project for a square punch if you owned one.  I trimmed a piece of cardstock for the base of the quilt so it would be slightly larger than the quilt and adhered all the squares to the base.  Then I used a piece of plastic canvas to create a pattern and mark the zig zag pattern.  It's all handstitched with embroidery floss.  Then trim a couple larger squares, one slightly smaller than the other, layer and attach to card with pop up adhesive.
 
That's it.  Have a wonderful weekend and thanks for looking ~ Michelle

Wednesday, April 17, 2013

Graphic 45 Giveaway WINNER!

First, let me welcome my new followers, thanks for stopping by and checking out my blog.  And thanks to those of you who have been followers.  I hope you all are inspired by what is published on this blog. 

Now without further delay, the winner of the 12 x 12 pad from Graphic 45 is...Jennifer Evans!  Contact me so I can get you your prize!!


**Winner was selected at random, all names were entered and my husband drew the winner**

Thanks again for liking my blog stay tuned for more projects and giveaways soon.

~ Michelle ~

Friday, April 12, 2013

Graphic 45 Giveaway!

Hi All,  I don't have any projects to share today.   My current project is painting a room for my girls and assembling a bunk bed.  So instead today I want to give something away.  How does that sound?

I have a 12 x 12 pad of paper of the Playtimes Past line from Graphic 45.  There are 2 each of 11 double-sided papers and oe double-sided die-cut tags sheet. 

 
All you have to do to enter is to become a follower of my blog.  So what are you waiting for?  Follow my blog and share this with your friend's so they can enter for there chance to win.  You have until 11:59 pm on Tuesday, April 16, 2013.
 
Happy Friday ~ Michelle

Tuesday, April 9, 2013

About A Girl Design Team Call

Hey all, wanted to share with you a new challenge sight that is having a design team call.  A great new opportunity for those of us with girls.  Check out all the details at the About A Girl scrapbook challenge blog. 

Thanks for looking ~ Michelle

Monday, April 8, 2013

Heidi Swapp Memory File Folder - Part 3

Today I'm sharing my final Heidi Swapp memory file folder mini album.  I really enjoyed with this product and trying some new to me techniques along the way.  Now I have the fun of adding photos and journaling.
 

For the front cover, I used the orange mat piece I trimmed off a photo frame that we used on the original memory file from the class.  It offers a nice pop of color on this cover.  Layer a tag and a flower over it.  Then I used the color magic paper and a Chromatix pen from American Crafts in Evergreen 3.  The banner shape piece was left over from our class so it was already cut.  Then I layered with a piece from Heidi Swapp trimmings and applied heat to the trim and the pink flower of the same material.  When you heat it the edges curl up.

 
The first page on the inside is a card made in the card class that I took from Jennifer Evans at Craft Warehouse.  I love taking classes from Jen, she is an amazing talent.  Lots of layers going on the front of this card. 

 
Here's the inside of the card.  There was a little handmade banner that was orignally to be on this piece, but I saved it and used as an accent in s different folder.

 
I love this small file folder and the pop of yellow off of it.  Again the yellow piece is trimmed off the back of a photo frame.  Add a tag and a few embellishments and it's photo ready.  The bracket shape at the top is made from fussy cutting around the excess color on one of the label stickers


For the inside of the small file I used one piece of patterned paper, one tag, a couple scraps  and a few embellishments.  I love that you can trim these decorative tags in so many ways to use in so many ways. 

 
On the back of the small file I used the "negative" side of the die cut banner.  Meaning the banner here is the result of using the piece left after removing the die cut banner.  This is a great way to get as much use out of your product as possibl. 

 
Here's the last page, again I used a small file folder and folded in thirds to fit the larger file.  On the front is some fussy cut chevron pattern and heart stickers. 


On the inside I used more tags, and emellishments as well as scraps of paper.  I love how all these turned out and have enjoyed sharing them with you.  Hopefully you have enjoyed them too.  Check back soon for another project.

Thanks for looking ~ Michelle

Friday, April 5, 2013

Heidi Swapp Memory File Folder - Part 2

Here's a peek at the second of three Memory File Folder mini albums I made recently using product from Heidi Swapp.
 

This cover is a more simple than the last one and utilizes a tag that is cut in half to use in more than one spot.  I fussy cut the chevron pattern strip and attached the flower with a coordinating brad made with my I-top tool from Imaginisce.  The other element I used on this album is the bracket, for this I fussy cut around the extra pattern around the file tab stickers.  Just cut around the outside of the pattern, peel and stick.
 
 
On the inside I trimmed down a small file and scored it on the top and bottom so it met in the middle.  On the outside is a piece of Heidi Swapp banner trim.  This stuff is hard to describe, it's not traditional paper and when you use a heat tool on it you get the curled up fringe.  Fun to play with!

 
On the inside of the card I used more fussy cut pieces from the sticker sheets.  It adds interest and makes the most of your supplies.

 
The front of the smaller file within the larger file is pretty simple.  The tag is open on top so the chevron piece can slide out.  The flower is the same material as the banner, when you apply heat the petals curl up.  Be careful with the heat though, some of mine curled a bit more than I wanted.
 
 
This page is really simple, I trimmed a piece of patterned paper to fit the inside of the small file.  Added a trimmed label for a bracket under the words Beautiful Songs and attached the envelope with the LOVE note card in it.
 
 
This page uses the Heidi Swapp's Color Magic paper.  I chose to use a black ink to add a little punch and standout among all the color.  Then I topped that with the crinkle fringe banner.

 
For the back of the small file I trimmed the side of a tag and flipped it upside down.  Then I added a flower and coordinating brad and added some heat to crinkle the petals. 
 
 
Then I made another mini flip album for this file too. 


That's all for this one.  Thanks for looking ~ Michelle

Tuesday, April 2, 2013

Heidi Swapp Memory File Folders - Part 1

Awhile back I had the opportunity to take a class from the wonderful Jennifer Evans.  In the class we received supplies to create our own Heidi Swapp Memory File mini album.  My mom joined me and we loved it so much we purchased supplies to create more of our own.  As with most of the items I purchase it sat there waiting for me to create something with it.  Then in February, Jennifer offered another class, this time we made three cards, using the same line of paper and accessories as the memory files we made in October.  This inspired me to get working on mine and knock a project of my list of things to do. 

I made three files in addition to the original we made in class.  Today I will be sharing the first of these with you. 


I started by sewing the smaller file inside the larger file.  This was a challenge since I'm not a sewer.  Once that was done I started work on the cover.  For this cover I used a Spellbinders Rose Creatioins flower die.  Each flower has a brad for the center, for the larger brads I used my I-top tool to make coordinating brads.  Then I simply layered the flowers over and around the tag and added the word sticker delight. I used my fingers to pinch the petals up to add some dimension.

 
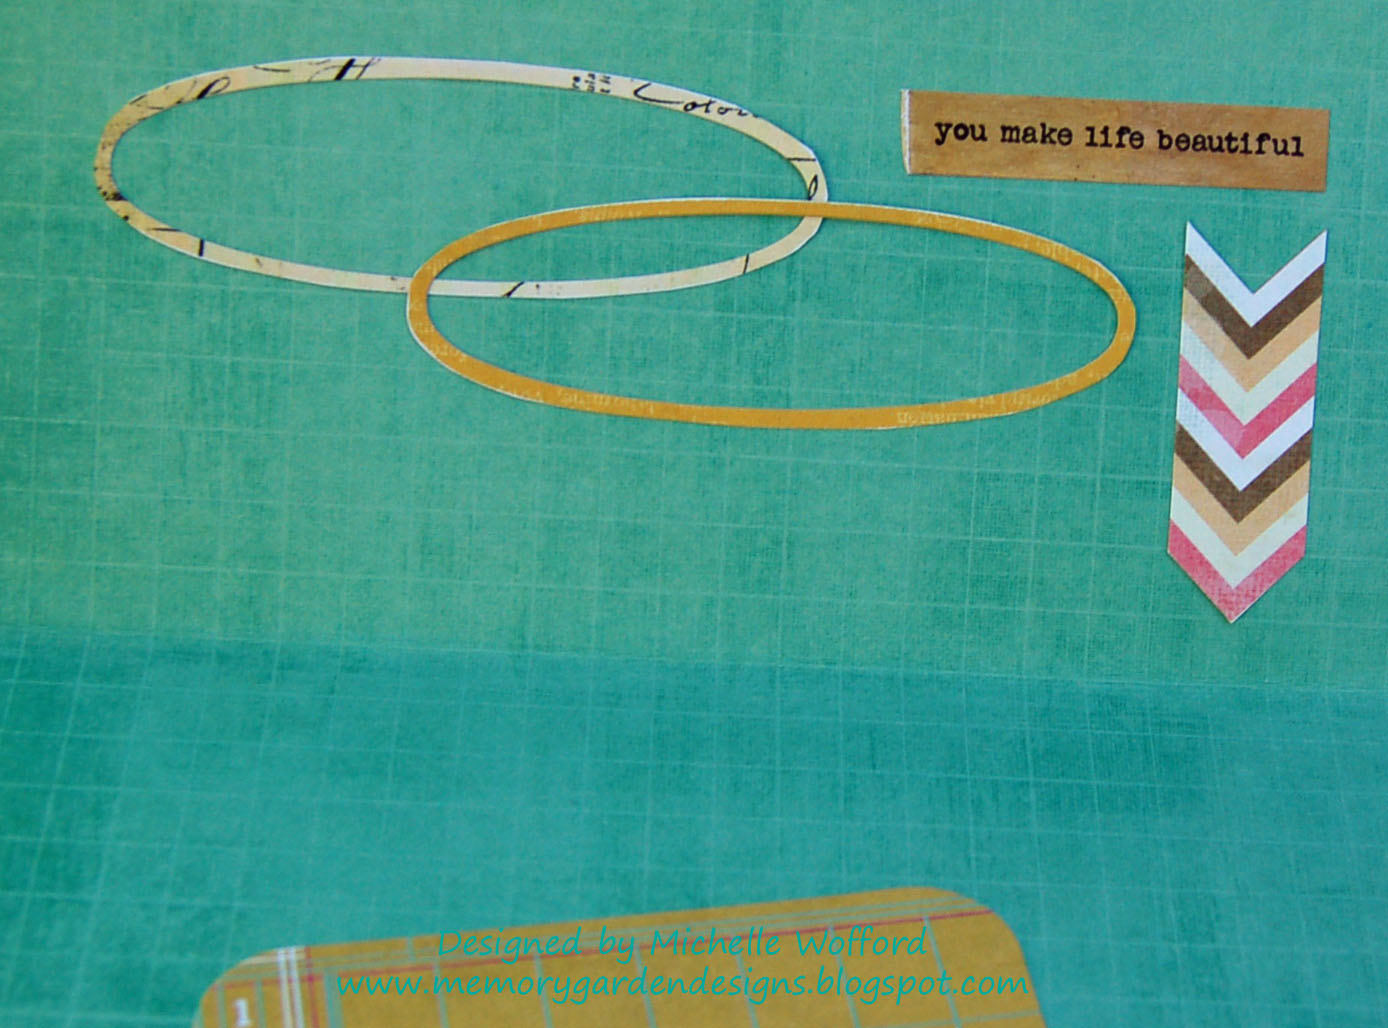
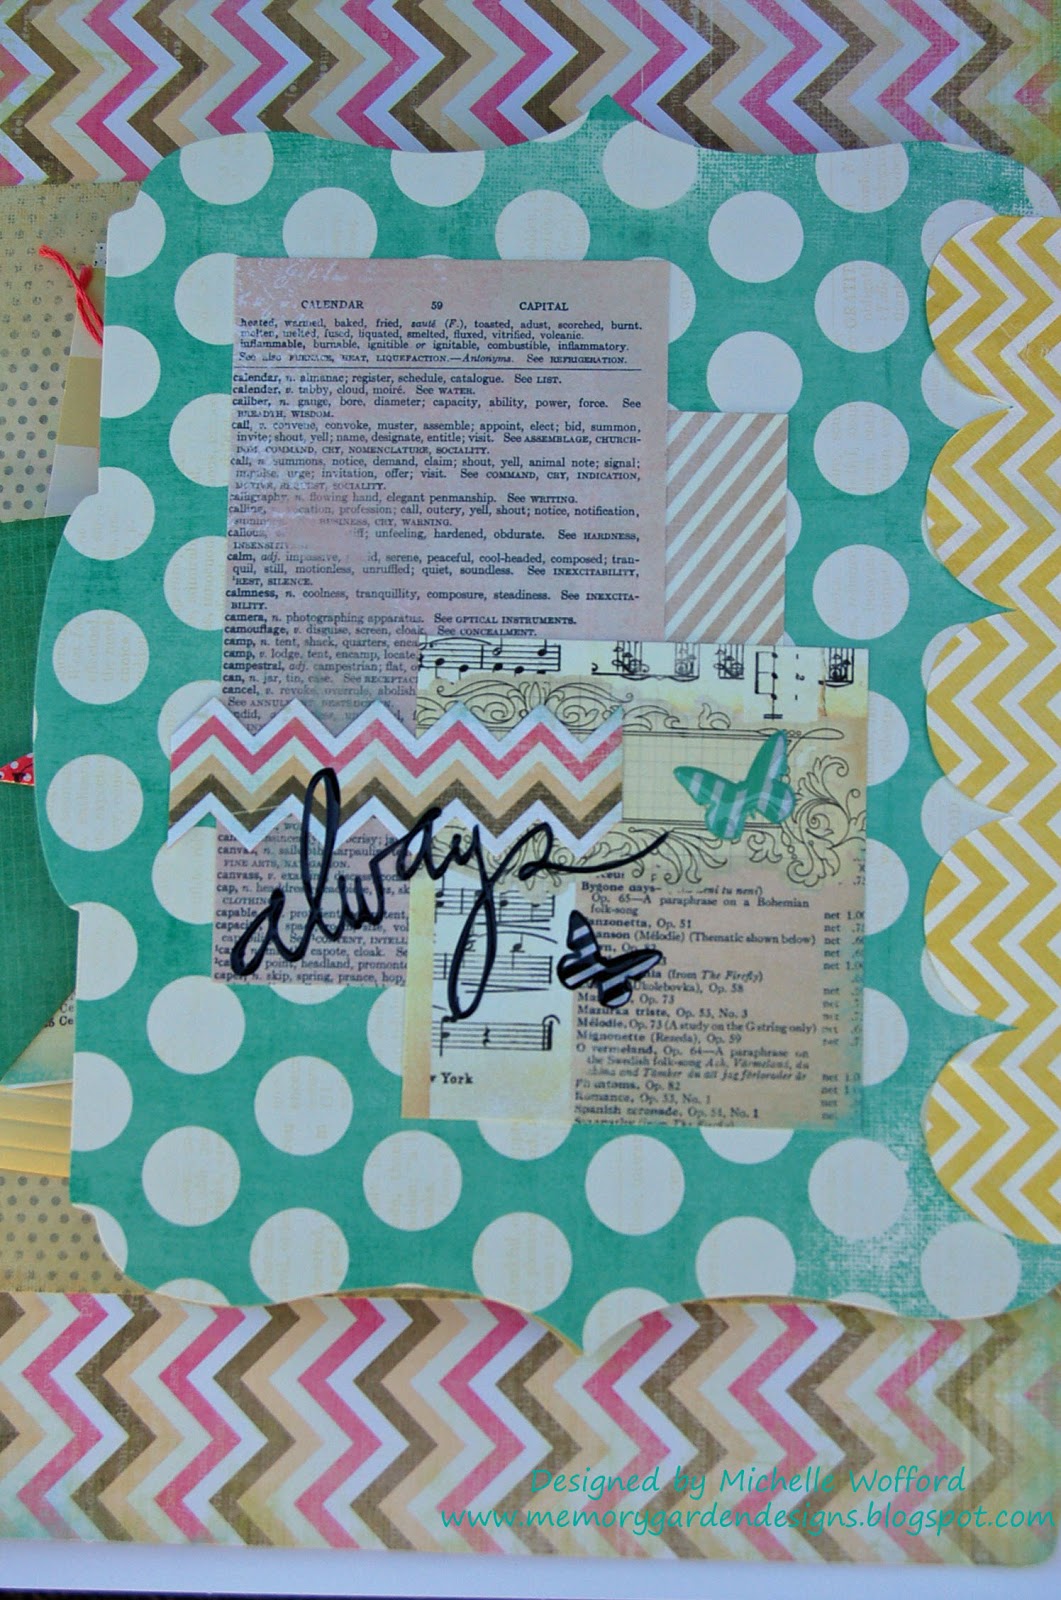
This is the first page on the inside.  I trimmed down a small file to fit the inside and topped it with one of the three cards we made in Jennifer Evans' class.

 
This is the inside what you see when you open that small file.  So you can add photos to the inside of the file and to the inside of the card. 

 
Here I covered some chipboard banner pieces from Maya Roads with patterned paper.  Attach some embroidery floss to the back and tie some knots between each banner piece and you have a fun coordinating banner.

 
On the next page I used the extra top piece to the pocket card that we made in the card class.  I didn't want to waste it so I used it on this page.  It is a bottem less pocket, so you could attach something or slide something through it.

 
And here's the pocket card.  This particular card is not my design but it makes a great addition to this file album.  Jennifer Evans made this one for us to make it class, but she got the idea from the talented Jamie Pate who is on the Heidi Swapp media team with Jennifer. 


Here's a glimps of the inside of the pocket card.
 
 
Back side of the small file insert.  I used all scraps on this page, with the exception of the scallop border and the epoxy stickers.

 
The original memory file we created in our class contained an insert that had some plastic sleeves in them and multiple tiered layers to add photos and journaling to.  Definately a great way to add a lot in a small space.  I loved the idea but only found one pattern available, so I picked up some 12 x 12 sheets and made my own with the use of a couple tools. 

 
All you need to make a tiered insert like this is a paper trimmer, a scoring tool, a decorative border punch and a strong adhesive like scor-tape.
 
This is one of three memory files I created, stay tuned for the others soon.
 
Thanks for looking ~ Michelle