Wednesday, March 23, 2016

Easter Cards

Happy Spring!  Today I wanted to share with you some Easter cards I made.  


For these card I needed a custom size, so I made the card bases from card stock that was trimmed to size.  To make a custom size card base, determine the desired width and length of the card.  Trim card stock to the longest length, then double the width and trim for the width.  For these cards I started with a piece trimmed to 7 1/2" x 11" for a finished card size of 7 1/2" x 5 1/2".


I embellished each card a little differently.  Ribbons were attached with brads and strong adhesive.  Some pieces were "scraps" from other projects, like the blue rhinestone swirls on the flower card.  These "scraps are perfect for little embellishments on cards.


Hope you have a wonderful Easter!

Thanks for looking!


Wednesday, March 16, 2016

Book Page Wreath

Today I want to share with you this fun wreath made from pages from a book.  I made this one as a decoration for my daughter's Nancy Drew themed party. 


To make the wreath I cut pages from a Nancy Drew book into square pieces.  Then I crumpled up each piece into a ball.  Then I undid each piece and hot glued it to the wreath form (I used the base of a pen to keep the pieces in place while glue cooled).  


These pages are from a newer book, but this could be made with older books too.

Thanks for looking!


Sunday, September 7, 2014

Mini Wedding Album

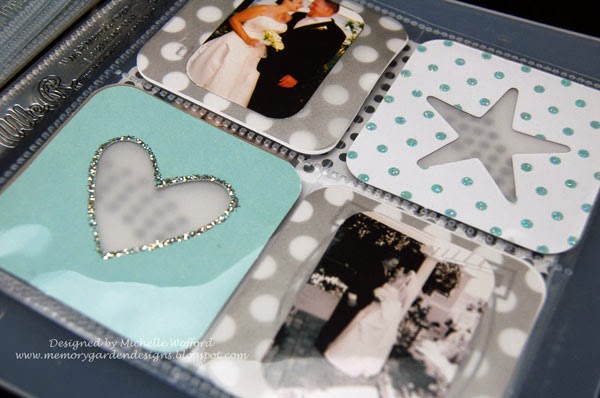
Hi there, I have you seen the Albums Made Easy albums and journaling cards from We R Memory Keepers? I'm loving these little albums, they are perfect for creating a small albums for an event or vacation.  Check out this mini album I created using the Studio Gold and Metallic collections.  


These albums have a new ring binder system on the inside and have small page protectors that measure 4" x 4", some of which have 4 smaller divided sections.


Here's a look at my first page.  I simply inserted this pre-made card into the page protector.  Now I could have left this as is but I thought it would be nice if I added a little something to it.  So I used my platinum Stickles to trace over the word "still", I did this on the outside of the page protector to add a little dimension to the page.


The Studio Gold collection contains both 4" x 4" and 2" x 2" pre-cut cards.  The metallic collection contains 4" x 4" and 2" x 2" of pre-cut vellum squares.  Here, I layered a vellum page over a paper page and added my journaling to the vellum.  And, while it's a bit hard to see, I embellished the photo on the right by adding Stickles over the bouquet of flowers.


Check out this divided page.  I love these little 2" cards, especially with the die-cut centers.  I layered this one with a striped piece of vellum and added some Stickles to highlight the dots.


For this page I used a die-cut 4" square that is cut to look like a Polaroid picture and turned it on it's side to frame this picture. 


How fun is this layered look!  I had a smaller picture that was the perfect height for the smaller divide pages.  There was no good spot to cut the photo in half so I layered it in the center over vellum squares that are layered with die-cut journaling cards.  


Here's the back side of that page.  I added some Stickles covered wood veneer stars from Studio Calico.  I then attached these to the outside of the page protector.


Here's another page where I traced the writing on the outside of the page protector with Stickles.  Stickles are great for this, as it has a fine tip for applications and makes it easy to trace fine details.


More Stickles here, and I love the combination of the cards with the vellum.  


Here's the back side of the star and heart page.


I love how this little album turned out. And they are perfect for those who use Instagram or phone cameras and the smaller photos.

 
Thanks for looking!

Saturday, August 23, 2014

Cards Made Easy!

Hello, today I've been playing with some new pieces from We R Memory Keepers, Albums Made Easy sets.  In particular I've been playing with the die-cuts and journaling cards from the Studio Gold set by Teresa Collins and the Sheer Metalic Vellum set.  I love these sets, not only are they great for creating fast and cute mini albums but they can be used for cards and other projects.  So check out these cute cards I made with these awesome sets.  


Each set comes with cards large cards that are 4" x 4" and 2" x 2".


For this first card I trimmed a piece of cardstock that was 4 1/4" x 8 1/2", score on the length at 4 1/4" and fold in half to create a card base that is 4 1/4" x 4 1/4".  Then I used the We R Memory Keepers corner chomper to round the corners using the 1/4" size.


On the inside of the card I used a mini distress ink pad to distress the edges of the card.


Now the card Shine's like a star.


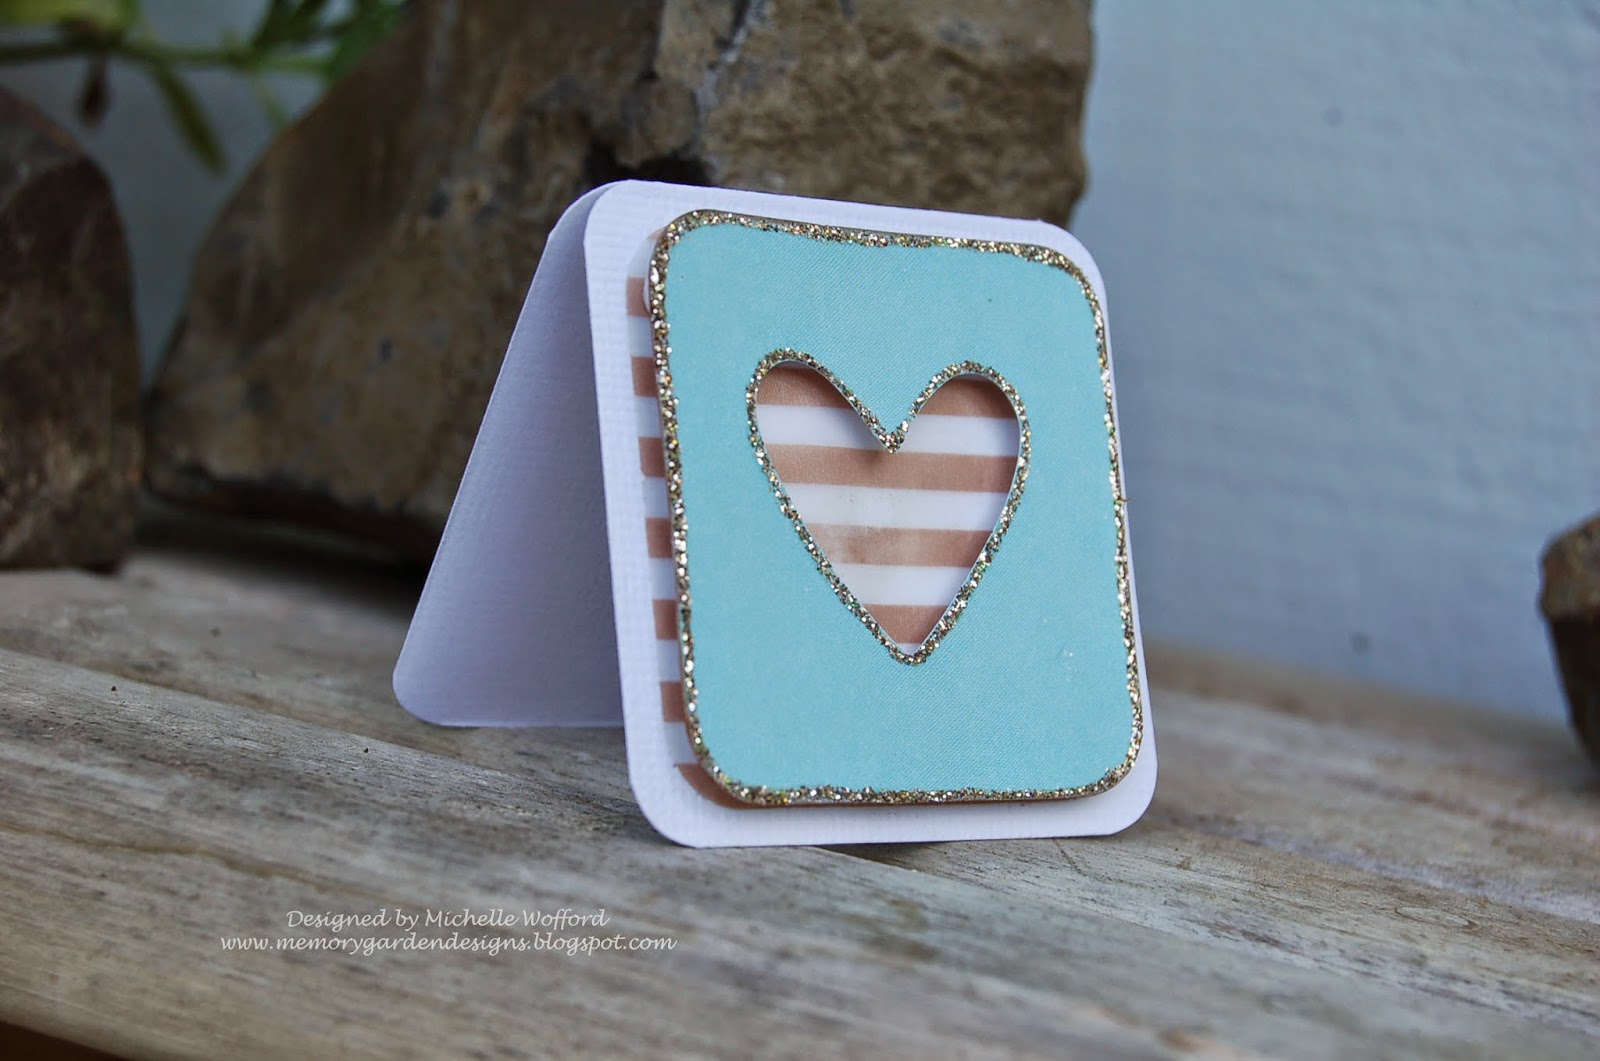
For the mini card I used this cute 2" x 2" card with a heart shape cut out of the center.  I added some stickles to accent the heart and the outer edge.


Same process for this mini card base just start with a cardstock trimmed to 2 1/4" x 4 1/2", score and fold in half.  


I used pop up adhesive to layer the open heart over a decorative vellum square from the sheer metalic set.  


These also make a great simple tag.  I trimmed a square of cardstock to 2 1/4" x 2 1/4", distressed the edges and attached a die-cut card that says thank you, perfect for attaching to a small thank you gift.


Supply List

Albums Made Easy Studio Gold Cards
Albums Made Easy Sheer Metallic  Vellum Cards
White Cardstock
Distress Ink and Applicator
 Stickles
Paper Piercer
Embroidery Floss
Adhesive


Thanks for looking!


Thursday, August 14, 2014

Dream Medallion Wall Hanging

Did you hear the news? Craft Warehouse had announced their 2014 Design Team. I'm excited to be returning as a member of their core team, they are a great company to design for. You can check out the entire team here

Today I want to share my latest project, a wall hanging made of accordion fold medallions using fun patterned paper and some awesome chipboard letters.


I love these chipboard letters because of their size and how versatile they are.  They are great for a decor piece like this or for banners.  


For details on how I finished the letters and how I made all those medallions with some fun paper from Echo Park, check out my post on the Craft Warehouse blog with a step by step tutorial, here.


Monday, August 4, 2014

Floral Doily Card

It's August, welcome to my favorite month! Though in Oregon we tend to get a little rain mid month in August, I still love this part of summer. Today I wanted to share with you this quick and simple card I made with an acrylic card base, a pretty die cut and a flower.


The acrylic base was already scalloped and it turns out that this floral doily punch works perfectly with it.  Simple, yet elegant.  A great card for any occasion or no occasion at all.

For more details on how to create this card, check out my post here, on the ScraPerfect blog.


Thanks for looking!


Sunday, July 6, 2014

Patriotic Star

Hello all, I know I'm a couple days late for a 4th of July post, but it's still patriotic and it's still 4th of July weekend so I hope you enjoy this fun patriotic star.


Here's the finished star.  The base is a chipboard shaped star, I attached festive paper to it and added some fun embellishements.


You can see more details for this project on the ScraPerfect blog here.  

Hope you are having a fabulous 4th of July weekend!


Thanks for looking!