Showing posts with label mini album. Show all posts

Sunday, September 7, 2014

Mini Wedding Album

Hi there, I have you seen the Albums Made Easy albums and journaling cards from We R Memory Keepers? I'm loving these little albums, they are perfect for creating a small albums for an event or vacation.  Check out this mini album I created using the Studio Gold and Metallic collections.  


These albums have a new ring binder system on the inside and have small page protectors that measure 4" x 4", some of which have 4 smaller divided sections.


Here's a look at my first page.  I simply inserted this pre-made card into the page protector.  Now I could have left this as is but I thought it would be nice if I added a little something to it.  So I used my platinum Stickles to trace over the word "still", I did this on the outside of the page protector to add a little dimension to the page.


The Studio Gold collection contains both 4" x 4" and 2" x 2" pre-cut cards.  The metallic collection contains 4" x 4" and 2" x 2" of pre-cut vellum squares.  Here, I layered a vellum page over a paper page and added my journaling to the vellum.  And, while it's a bit hard to see, I embellished the photo on the right by adding Stickles over the bouquet of flowers.


Check out this divided page.  I love these little 2" cards, especially with the die-cut centers.  I layered this one with a striped piece of vellum and added some Stickles to highlight the dots.


For this page I used a die-cut 4" square that is cut to look like a Polaroid picture and turned it on it's side to frame this picture. 


How fun is this layered look!  I had a smaller picture that was the perfect height for the smaller divide pages.  There was no good spot to cut the photo in half so I layered it in the center over vellum squares that are layered with die-cut journaling cards.  


Here's the back side of that page.  I added some Stickles covered wood veneer stars from Studio Calico.  I then attached these to the outside of the page protector.


Here's another page where I traced the writing on the outside of the page protector with Stickles.  Stickles are great for this, as it has a fine tip for applications and makes it easy to trace fine details.
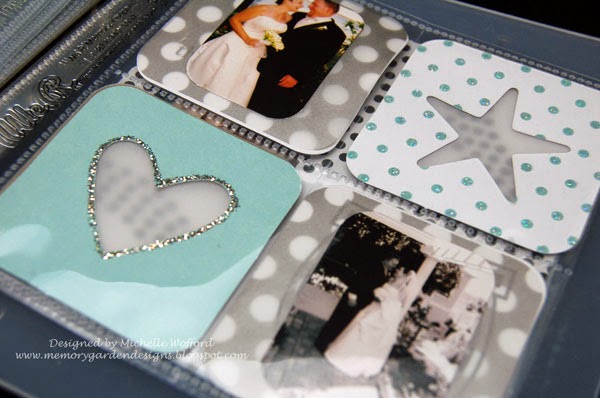

More Stickles here, and I love the combination of the cards with the vellum.  


Here's the back side of the star and heart page.


I love how this little album turned out. And they are perfect for those who use Instagram or phone cameras and the smaller photos.

 
Thanks for looking!

Tuesday, March 25, 2014

Tea Pot Box and Mini Album

 
Hello Everyone, a couple months ago my mom and I took my daughter's to a tea room for a fancy tea party.  The girls dressed up in their fancy dresses and all.  Naturally I took lots of pictures while we were there and I wanted to create something special to preserve those memories. 


 I created this Tea Pot box using two piece from a Clear Scraps Tea Pot shaped Chipboard album.  I covered all sides with patterned paper then created the box portion from a piece of chipboard. 
 
 
 Inside the box is a mini acrylic album shaped like a tea cup.  I embossed every other tea cup piece and added photos from our tea party.
 
 
I printed smaller photos so they are easy to add to a mini album.  I let the embossing be the main embellishment for the album and left it pretty simple as I didn't want to clutter the pictures. 
 
 
Thanks for looking!
 

Monday, April 8, 2013

Heidi Swapp Memory File Folder - Part 3

Today I'm sharing my final Heidi Swapp memory file folder mini album.  I really enjoyed with this product and trying some new to me techniques along the way.  Now I have the fun of adding photos and journaling.
 

For the front cover, I used the orange mat piece I trimmed off a photo frame that we used on the original memory file from the class.  It offers a nice pop of color on this cover.  Layer a tag and a flower over it.  Then I used the color magic paper and a Chromatix pen from American Crafts in Evergreen 3.  The banner shape piece was left over from our class so it was already cut.  Then I layered with a piece from Heidi Swapp trimmings and applied heat to the trim and the pink flower of the same material.  When you heat it the edges curl up.

 
The first page on the inside is a card made in the card class that I took from Jennifer Evans at Craft Warehouse.  I love taking classes from Jen, she is an amazing talent.  Lots of layers going on the front of this card. 

 
Here's the inside of the card.  There was a little handmade banner that was orignally to be on this piece, but I saved it and used as an accent in s different folder.

 
I love this small file folder and the pop of yellow off of it.  Again the yellow piece is trimmed off the back of a photo frame.  Add a tag and a few embellishments and it's photo ready.  The bracket shape at the top is made from fussy cutting around the excess color on one of the label stickers. 


For the inside of the small file I used one piece of patterned paper, one tag, a couple scraps  and a few embellishments.  I love that you can trim these decorative tags in so many ways to use in so many ways. 

 
On the back of the small file I used the "negative" side of the die cut banner.  Meaning the banner here is the result of using the piece left after removing the die cut banner.  This is a great way to get as much use out of your product as possibl. 

 
Here's the last page, again I used a small file folder and folded in thirds to fit the larger file.  On the front is some fussy cut chevron pattern and heart stickers. 


On the inside I used more tags, and emellishments as well as scraps of paper.  I love how all these turned out and have enjoyed sharing them with you.  Hopefully you have enjoyed them too.  Check back soon for another project.

Thanks for looking ~ Michelle

Tuesday, April 2, 2013

Heidi Swapp Memory File Folders - Part 1

Awhile back I had the opportunity to take a class from the wonderful Jennifer Evans.  In the class we received supplies to create our own Heidi Swapp Memory File mini album.  My mom joined me and we loved it so much we purchased supplies to create more of our own.  As with most of the items I purchase it sat there waiting for me to create something with it.  Then in February, Jennifer offered another class, this time we made three cards, using the same line of paper and accessories as the memory files we made in October.  This inspired me to get working on mine and knock a project of my list of things to do. 

I made three files in addition to the original we made in class.  Today I will be sharing the first of these with you. 


I started by sewing the smaller file inside the larger file.  This was a challenge since I'm not a sewer.  Once that was done I started work on the cover.  For this cover I used a Spellbinders Rose Creatioins flower die.  Each flower has a brad for the center, for the larger brads I used my I-top tool to make coordinating brads.  Then I simply layered the flowers over and around the tag and added the word sticker delight. I used my fingers to pinch the petals up to add some dimension.

 
This is the first page on the inside.  I trimmed down a small file to fit the inside and topped it with one of the three cards we made in Jennifer Evans' class.

 
This is the inside what you see when you open that small file.  So you can add photos to the inside of the file and to the inside of the card. 

 
Here I covered some chipboard banner pieces from Maya Roads with patterned paper.  Attach some embroidery floss to the back and tie some knots between each banner piece and you have a fun coordinating banner.

 
On the next page I used the extra top piece to the pocket card that we made in the card class.  I didn't want to waste it so I used it on this page.  It is a bottem less pocket, so you could attach something or slide something through it.

 
And here's the pocket card.  This particular card is not my design but it makes a great addition to this file album.  Jennifer Evans made this one for us to make it class, but she got the idea from the talented Jamie Pate who is on the Heidi Swapp media team with Jennifer. 


Here's a glimps of the inside of the pocket card.
 
 
Back side of the small file insert.  I used all scraps on this page, with the exception of the scallop border and the epoxy stickers.

 
The original memory file we created in our class contained an insert that had some plastic sleeves in them and multiple tiered layers to add photos and journaling to.  Definately a great way to add a lot in a small space.  I loved the idea but only found one pattern available, so I picked up some 12 x 12 sheets and made my own with the use of a couple tools. 

 
All you need to make a tiered insert like this is a paper trimmer, a scoring tool, a decorative border punch and a strong adhesive like scor-tape.
 
This is one of three memory files I created, stay tuned for the others soon.
 
Thanks for looking ~ Michelle