Showing posts with label Assignments. Show all posts

Saturday, February 4, 2012

Craft Warehouse Design Team Assignment 3 (part 2...finally)

Well, it's been too long from the part 1 post so I guess I better start posting more regularly. But without further delay here is part two of the last Craft Warehouse DT assignment.


For this assignment we were given a blank oval plaque to alter using Crate Papers Farm House line.  I knew right away that I wanted to create the look of a quilt using multiple papers from the line.  In my mind I was going to use all the paper in the same pattern shown.  As I was playing with the design I decided to make it a little simpler for fear of it being too busy.  To get this look I cut squares the size I wanted and  then cut them in half on the diangnle.  Then I just placed them every other one to create of pinwheel look.  The die cut flowers are from the Tim Holtz tattered floral die.  All other accents are pieces from the collection of die cuts or accents.  I loved working with this line and with all the Crate Paper goodies. 

Tuesday, November 29, 2011

Craft Warehouse DT Assignment 3 (Part 1)

For our third Design Team assigment we got to work with Crate Paper's Farmhouse collection.  It was awesome, I love this paper and all the great coordinating pieces.  The buttons and brads are especially fun.  The first part of our assignment was to create a 12 x 12 layout using multiple pieces of the patterned paper from the collection, brads, buttons, diecuts and chipboard stickers from the collection.  We were also to incorporate some of the Tim Holtz resist kraft paper.  Here's what I came up with.

Sweet Family Moments Layout


I didn't know what to do with the resist paper until I got the idea to create a recipe book.  I trimmed a recipe card from the accent sheet and trimmed two pieces of the resist paper to serve as the pages inside the recipe book.  Fold all pieces down the center and adhere the inside pieces towards the spine so you can open the book.  I added a sticker that says Memories on top and embellished the fron cover.  You could easily use this to hide some journaling or extra pictures you wanted to include.

Thanks for looking ~ Michelle

Monday, September 26, 2011

Craft Warehouse DT Assignment 2 part 2

For this part of the assignment we were asked to create a set of 4 cards using the Christmas Eve Chowder line from Jillibean Soup.  I really enjoyed working with this line and might have to go get more. 

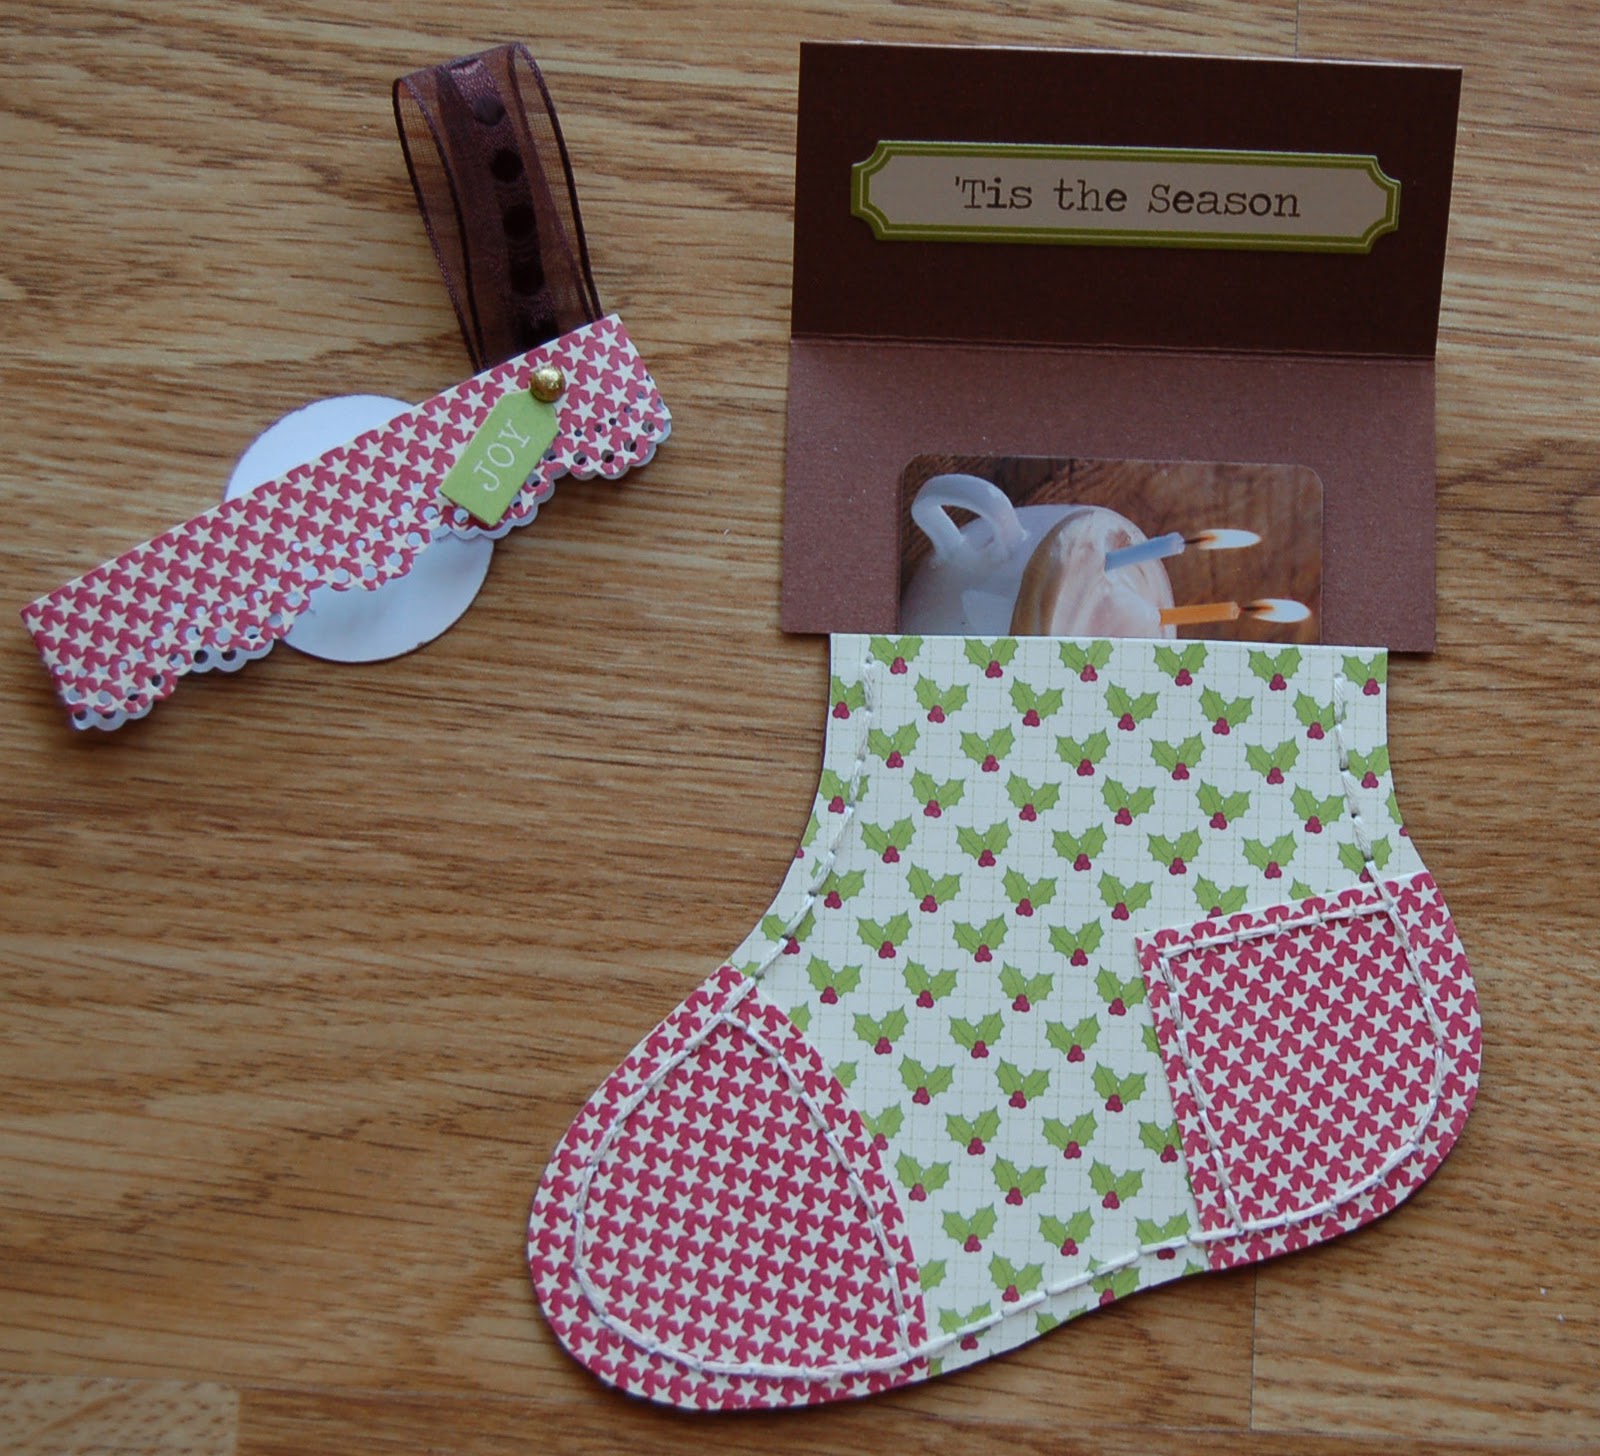
First is a gift card holder ~


For this card I used a template to cut all the pieces.  I used We R Memory Keepers Sew Easy tool for the stitching around the stocking and hand punched the stitches on the insides of the patches.  The Martha Stewart doily lace punch was used on the band for the closer.

Photo Card ~


Check out split coast stampers for the template to make this recessed window card.  I enjoyed making this card, probably becaused I love this photo of my daughter.  It works well with this paper line.

Tri - Shutter - Elaborate card ~


This template can also be found at splitcoaststampers.com under tri-shutter card.  I love making these cards and the flowers add a nice touch.

And finally my Simple card -

I really wanted to use the penguin paper and was happy to fit it onto this simple card.  I added a sparkley brad to the top of the penguins hat and other than that it's just paper, die cut stars and a sticker.

Thanks for looking ~ Michelle ~

Thursday, September 22, 2011

Craft Warehouse DT Assignment 2 part 1

Wow, it's been a long time since I've posted anything.  The last couple months have been busy and somewhat full of computer problems.  But, I'm able to edit photos again and hopefully will get back to posting regular posts.  So without further ado here are the first two pieces from my second assignment for the Craft Warehouse design team. 

For this assignment we needed to create a layout and a card / tag using the Apple Cheddar line from Jillibean Soup.  Though this is something that I probably would not normally buy, I love this line and enjoyed creating with it.  The biggest challenge...we were only given a 6x6 pad of the line so we had no 12 x 12 pieces to incorporate into the layout.  Here's what I came up with...

Sweet 2 The Core Layout -

To create the flower I cut two 1 1/2" x 6" strips and two 1" x 6" strips and punched the all on one side using the Martha Stewart doily lace punch found at Craft Warehouse.  Once all pieces are punched I scored at every peak and valley and folded at each score. I then attached the two 1 1/2" strips together and the two 1" strips together to create one long strip. Connect the two ends of each piece to create a circle. Then I attached the larger piece to a scrap piece of paper and adhered the smaller piece on top.

Here's my card -

For the card I stamped the image from Pebbles Inc, on several sheets of patterned paper from the collection and hand cut each one out.  I layered them so a bit of each were showing and placed the hand cut basket on top.  

Thanks for looking ~ Michelle ~ 

Tuesday, August 2, 2011

Craft Warehouse Design Team Blog Assignment

I was selected as one of the first two Craft Warehouse DT members to have a blog assignment.  I was excited to have this first challenge.  Be sure to check out the Craft Warehouse Blog to see all the details on this project and how you can create one yourself.

Bits of Summer printer tray -


Thanks for looking,
~ Michelle ~

Tuesday, July 26, 2011

Craft Warehouse Design Team Assignment 1

For our first DT assignment we were given one of the new lines from the new company Authentique.  I received "Blissful", the yellow line.  This would have been the last color pallet I would have selected so I'm glad it's what I got as it was more of a challenge.  We also received coordinating die cut pieces and stickers from the line and ribbon from American Crafts.

Assignment 1.1 - 12 x 12 layout, using multiple pattern paper, ribbon, some of each embellishment provided and must include one paper alteration technique. 


I began thinking my paper alteration technique was going to be fussy cutting flowers out of one of the pattern papers.  However, I wasn't liking the results and ended up creating a ribbon type flower using strips of pattern paper.  I did use one fussy cut flower with the two postage stamp icons on the bottom left.  One of the nice things that Authentique offers is the backside of their die cuts have a coordinating pattern on the back so you can use the front or the backside, which I've used here. 

Assignment 1.2 - Create a Card or Tag using at least two of the pattern papers, two embellishments and the unity stamp provided.

I chose to create a pocket card because I thought it would showcase the papers well.  I used black cardstock to create the base.  I stamped the bird stamp on the gray and yellow papers and cut around the scallop on the yellow and around the circle on the gray. I used to of the die cut icons one on the outside and one for the sentiment on the inside.


Assignment 1.3 - Create a layout using several papers, Tattered Angels glimmer mist and resist chipboard.


For this layout I started  by glimmer misting the entire 12 x 12 piece of resist chipboard.  Loved the look until I went to use it with the paper.  I don't own a lot of dies to die cut the cb so I tried tearing a piece.  It started to bend and crease when I started to tear it so I ended tearing and crumbling it to give it a distressed look.  I didn't like the mustard seed glimmer misted chipboard with my paper choices so I ended up running my black VersaFine ink pad over the top.  The result, a subtle hint of glimmer through the black ink.  Love the look.

Thanks for looking.

~ Michelle ~